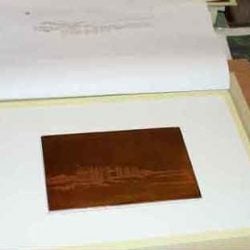
“I use a copper or zinc plate and work on it to produce a design by etching the metal with acid. Each plate goes through various procedures to produce the desired result and happy accidents happen on the way – and sometimes unhappy ones!
I start by rolling a thin layer of acid resist ‘ground’ on to the plate and then draw any outline needed. A ‘hard ground’ produces a crisp line whereas a ‘soft’ ground gives a softer effect. The plate goes into an acid bath which etches the exposed metal, the longer it stays in there the darker the line will be when inked.
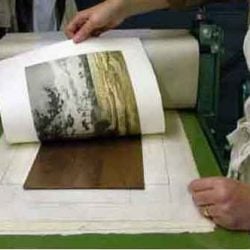
I then take a first proof to see how it has etched and decide how to proceed. I use an etching press which works by forcing the plate through metal rollers protected by woollen blankets.
Any adjustments can be made to the plate by adding another ground or mistakes can be tackled with a metal burnisher.
Shape and form is usually added by applying an aquatint. This is a fine wood powder which is sprinkled onto the plate and then melted to fix it. This will form a series of dots and the acid will bite around them to produce tonal areas.
The lightest tone is stopped out first to prevent further etching and the plate goes through a series of bitings until the very darkest tone is achieved.
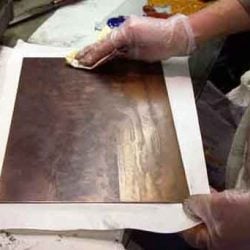
It is unusual for the tones to work at the first attempt so there is often lots of burnishing and reaquatinting until it looks OK. When I am satisfied with the result and have decided on the colours I will print up a few using Hahnemuhle etching paper. Each etching is inked and wiped by hand using oil based permanent inks and muslin. Coloured inks are usually applied in one application and great care is taken when wiping them off so that the colours are not muddied.
Each finished etching from an edition is slightly different due to the inking methods and are therefore original. They are carefully numbered, signed and stored in acid free folders”.
Chrissy Norman 2023